So the last thing I did before returning the loaned Olympus OM-D E-M5 Mark III was testing it for vlogging. It is something that I do not do really, I don't call my videos vlogs, I think they are just videos with content that I have planned carefully and with clear ideas and messages that I wanted to convey. I think vlogs are just random people recording videos of themselves doing random things, or ranting about their lives, which can be fun an entertaining, but my life is nothing but random, and I don't think I am that fun. Therefore, the general vlogging format does not suit my approach in doing video, but I acknowledge a majority of content creators, YouTubers and social media influencers (oops did I just say the word influencer out loud?) have come to love and use the vlogging method as a part of their content and routine. I made this video (click here to watch), and extension to that, this article to discuss the use of Olympus OM-D E-M5 Mark III as a vlogging tool. 


The 5-Axis image stabilization on the E-M5 Mark III is probably the single, most stand-out feature and capability of the camera against any other competitors in the market. Like seriously, did you see how amazingly smooth and steady the footage from E-M5 Mark III is? It is like having a mini gimbal or steadycam. Ok truth to be told the level of stabilization is nowhere near what a true gimbal can do, but still it is the best we can get at the moment in the market on a camera and the image stabilization can make a lot of difference for small creators, YouTubers or cinematographers starting out using minimalist and simple gear setup. It just freaking works!

Walking around with the E-M5 Mark III, holding it with my hand, was not fun. I do not enjoy doing videos this way. The multitasking is real - hold the camera with one hand, walk, make sure not hit by car or motorbike, or walk into an open drain (we have a lot in Malaysia), think of what to say, and make sure you are within the frame.  The amount of brainpower required to execute the typical vlogger style video is insane. It is not only dangerous, but not easy to execute! Massive respect to all vloggers out there. As for me, after this video, I will resume my simpler video shooting style, have the OM-D camera rested on a tripod and just talk without having to worry about 10,000 things while I do that.

The Autofocus was fantastic. I tested the AF on 3 lenses, 17mm F1.8, 12mm F2 and 45mmm F1.8. The AF had no issue locking  onto my face without being easily distracted by people moving within my frame, or any other subjects. Even under severe backlit, the AF worked extremely well, staying on my face. It stays on me throughout the duration of the video, and the AF did not even fail one. Bear in mind that if you use Panasonic lenses, the AF effectiveness will dip a little, and if you use an even older lens from Panasonic, the AF reliability will drop. If AF is priority when shooting video with E-M5 Mark III, just use Olympus lenses. It is not like they lack choice. There is plenty to choose from!

I saw a  YouTuber complaining about the inability to do auto-exposure on E-M5 Mark III while on video. I am not sure what happened to his E-M5 Mark III or what settings he did to the camera, my auto exposure worked perfectly, with no issue. If that was his number one complain as a dealbreaker from buying the E-M5 Mark III as a vlogging camera, then do not panic, the auto exposure works perfectly fine.

What else do you need from a Vlogging camera? There is a microphone input, which I used my lavalier microphone to record my own voice. There is no audio monitoring, which is a bummer, but if you want to do any serious video production, go to E-M1 Mark II and E-M1X guys, they even have the OM-LOG400 profile which is missing from E-M5 Mark III.

But hey, I am not the typical vlogger. But in terms of image stabilization, C-AF during video tracking face, clean, sharp footage and having that cinematic, amazing colors and look straight out of camera with minimal work necessary, the E-M5 Mark III may just be for you! 

Please follow me on my social media: Facebook PageInstagram and Youtube

Please support me and keep this site alive by purchasing from my affiliate link at B&H. 
I released a short video "Robin In The City" yesterday on YouTube, if you have not seen it kindly check it out here. That video was filmed entirely on Olympus OM-D E-M5 Mark III in Kuala Lumpur. I am a noob when it comes to videography/cinematography, so I am reviewing the video shooting capabilities of the E-M5 Mark III from a newbie's perspective! I will explore the effectiveness of 5-Axis Image Stabilization for video, the C-AF capability while filming and also my general experience using the E-M5 Mark III doing the short film "Robin In The City". I made a video to share my experience here (click to watch). 


The concept of the short film was fairly straightforward - it was about me (Robin), being represented by a Robin Lego Brickheadz going about in Kuala Lumpur city. I came from a smaller city, Kuching which is situated in Borneo,  and having lived in KL for many years, it has never failed to awe me every time  I stepped into the city. I wanted to capture that sense of wander and grandeur, from a small town boy's perspective. The video also chronicles my daily journey, I commute on the LRT and the places and scenes shown in the video were places that I do visit. In the second part of the video, the city was caught in a thunderstorm, and yes, it rained a lot in this tropical weather. Sometimes I was caught unprepared and was drenched wet in the heavy rain. I wanted to show that too. There is nothing too deep or layers of meaning to peel from the short film, but one important emotion I did want to convey was a feeling of loneliness. I am not sure if you can see it, but yes, the theme was loneliness, though it was very subtle. 

Now coming back to the technicalities of filming the short video. 

1) Everything was shot on Olympus OM-D E-M5 Mark III, and I did this video alone, with no aid from anyone else. I wanted to ask a few friends to tag along for some behind the scenes footage, but I figured I have bothered too many people and asked too many favors from my previous review video, so it is not nice to trouble any of my friends further. 

2) It took me about 7 hours out on the street to get all the footage (I was out at 10am and finished the last raining shot at about 5pm). 

3) Everything was shot hand-held, with no use of tripod, gimbal or any sort of stabilization support. I used both Movie Stabilization 1 and 2 modes. For wide angle, uncropped scenes I used M-IS 2 mode. For everything else, M-IS 1. I may have accidentally used M-IS 2  when I was walking around, some wobbly effect was seen, which was not supposed to be present with use of M-IS 1. 

4) I used 3 lenses for this short video. The lens I used most was M.Zuiko 17mm F1.8, which covered 90% of the shots. For close ups of the Lego Robin and some scenes during the rain, I used M.Zuiko 45mm F1.8. I also used M.Zuiko 12mm F2 for wide scenery shots. 

5) I used C-AF for the entire video shooting. I tapped the screen to "pull focus". 

6) I used ND filters for all scenes before the rain. I had Variable ND 2-400 for both 45mm f1.8 lens and also 17mm F1.8 lens (17mm and 12mm shares the same filter thread). 

7) The whole movie was shot on Manual Exposure mode. Shutter speed was kept at constant 1/50sec, Aperture varies depending on situations (for blur background, I used wide open, for scenery shots, I used F4 or narrower), ISO was fixed at 200. I adjusted the ND filter to achieve correct exposure balance. 

8) The video was shot in "Natural" color profile. I decided not to use Flat Profile, because I did not want to do any color grading, and honestly, I don't know how at this moment. I relied on Olympus' superb straight out of the camera color profile, which I have come to love over the years. I did not do any other changes to the image profile parameters (contrast, saturation, sharpness, noise filter, all on default). 

9) White balance was set to Daylight. If there was a greenish/blueish tint, that was because of the ND filter (I used cheap no brand filters). It could have been easily corrected if I set the White Balance to Auto, but I wanted to maintain color consistency, hence I set to Daylight. 

10) The footage was all shot in 24p, on Cinema 4K, except the slow motion rain scenes, which were shot in Full HD 120FPS mode. 

11) Battery life was not great. I managed to get a total of about 30 minutes footage before the battery died. Do consider to get MANY spares if you want to shoot video with E-M5 Mark III. 

I am seriously noob in making video, so please do cut me some slack and forgive some of my mistakes if I did any. I figured I have to dive in now, and started doing something, else I will just remain noob forever. 

The stabilization works like a charm. You must know I am new to all this and I know not how to do "cinematic movements". I was happy with how shake free and stabilized the output was, and I have to say, this is the best that you can get from a system camera, the most capable image stabilization, without the use of gimbal. The gimbal or steadycam will still give you steadier results, but not everyone wants to carry more equipment. Not all of us are cinematographers, and I don't see myself venturing into making videos seriously. My passion is in photography, that will not change. So for someone like me, who does not intend to use a gimbal, who keeps the setup as minimalist as possible, the 5-Axis IS from Olympus is a Godsent. 

The Continuous Autofocus just freaking works! The one thing I worried the most while shooting the video was AF during filming. I had no idea what to expect since I lack experience from doing video work, and unlike shooting stills, I cannot zoom in/magnify my shots during preview to ensure critical focus. Inspecting all the shots, they were ALL, I repeat, ALL in focus. I was genuinely impressed. If the E-M5 Mark III works for someone as new to video as me, the C-AF is almost foolproof to anyone!

Overall I just love how small the camera is, and how well it handles with all the small prime lenses. I strongly suggest using the prime lenses, 12mm, 17mm, 25mm, 45mm and 75mm, these lenses can give you sharp footage with incredible shallow depth of field effect, low light shooting and super reliable AF during video. Yet they were so small and easy to move around with the camera. 

If you are a cinematographer I am sure you already know the kind of gear you are getting, the professional kind. E-M5 Mark III is not competing with that, instead it allows people like me, people with very limited knowledge and experience with video shooting to just pick up the camera and shoot. Yet I come home with very usable results! The image stabilization works and the AF is insanely reliable. Vloggers out there, I don't think there is other camera better than this! You get Cinema 4K at 237Mb/s, Flat Profile (if you want to color grade) and 120FPS Full HD slow motion!

I will do ONE more post/video about E-M5 Mark III, and I will be doing it the typical Vlogging style. It shall be out in a few days. Stay tuned!

Please follow me on my social media: Facebook PageInstagram and Youtube

Please support me and keep this site alive by purchasing from my affiliate link at B&H. 
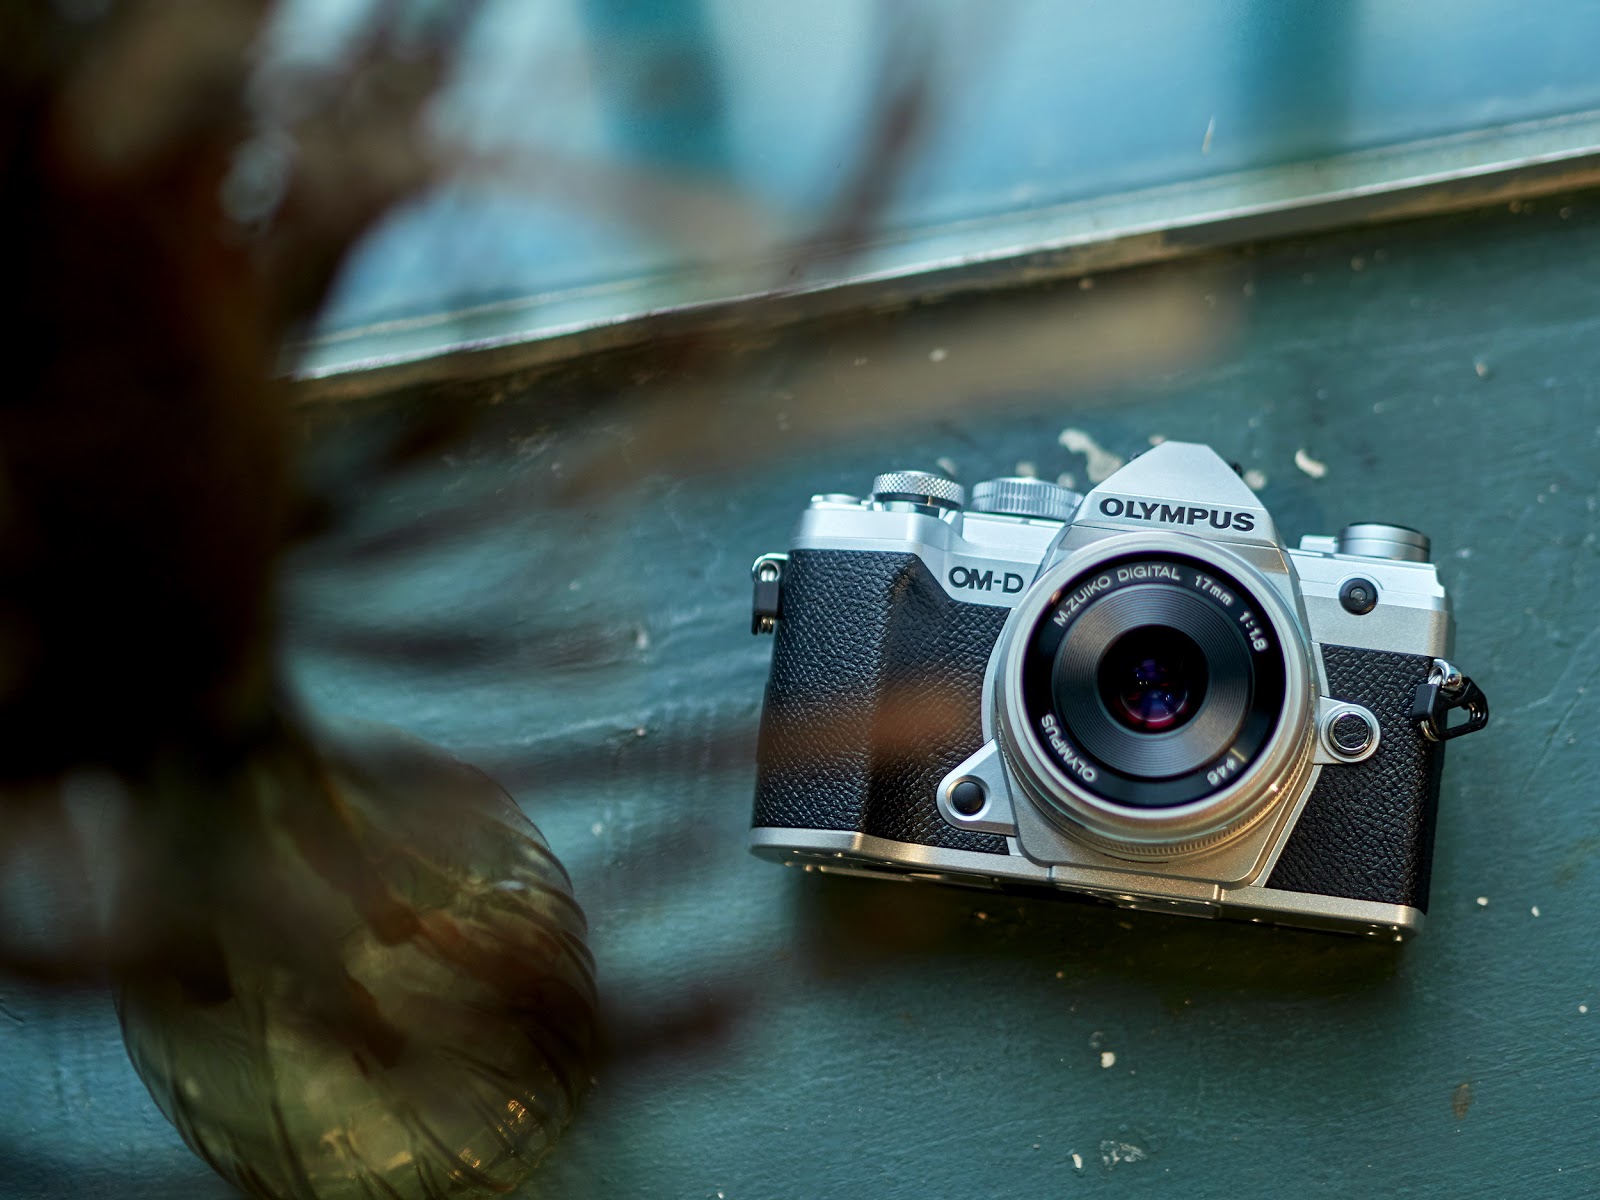
The much awaited and long overdue Olympus OM-D E-M5 Mark III is finally launched today, and thanks to Olympus Malaysia I have had a loaner to shoot with for the past almost 2 weeks. The E-M5 Mark III is a huge upgrade from the previous E-M5 Mark II, with overall performance and feature set matching the flagship camera E-M1 Mark II. The E-M5 Mark III has similar 20MP image sensor, Truepic VIII engine, 5-Axis IS capability, AF performance and video shooting features from the E-M1 mark II. In this article, I am exploring what the E-M5 Mark III can do when it comes to various shooting environment. 

Here is a video review (click here) I have done for Olympus OM-D E-M5 Mark III on YouTube! Yay, Robin Wong finally reviews cameras on YouTube!


In modern times, the Olympus OM-D E-M5 not only became the turning point for Olympus but also shaped the course of what a mirrorless camera should be and was capable of. It was a camera no one saw coming, as deeply involved as I was with Olympus, even I was pleasantly surprised with what the E-M5 can do. E-M5 effectively set many new benchmarks for what the mirrorless system is, and the many new features and improvements found in the camera was subsequently incorporated into many other newer camera models from Olympus as well as other manufacturers. It was indeed an exciting time and I was glad I was involved with the initial review of Olympus OM-D E-M5 when it was launched. In this new video I am making, it is a little throwback to that 2012 released E-M5, and let's dive deep into what made that camera such a winner!


Here are the 10 things Olympus got right with their Olympus OM-D E-M5

1) WEATHER SEALING
At that time, mirrorless cameras were seen as mere toys, or nothing serious for photography use. Build quality were mostly plasticky and the cameras were small, unprofessional looking. However, the E-M5 was announced as the first mirrorless camera to be weather sealed. The splashproof and dustproof design sent a very loud and important message - this camera meant business, and was not just a toy. The weather-sealing allow the E-M5 to push shooting envelopes and be used in harsh operating environment. This was a bold but necessary move to change the public perception of what a mirrorless camera can do, and how it is the future, overtaking DSLR.

2) FAST & RELIABLE AF
All mirrorless cameras (not just Olympus) before E-M5 had sluggish, almost unreliable Autofocus. (with the exception of E-P3, which the E-M5 uses the same AF system). The contrast detect AF was accurate but too slow to acquire focus. Phase detect AF in DSLR system was already mature and the performance difference was obvious. Therefore, many professionals and serious hobbyists were reluctant to pick up a mirrorless camera due to the poor AF performance. Somehow, E-M5 managed to improve the AF based on contrast detect (at least for S-AF) to a point that it was matching the AF speed of even the fastest DSLR at that time. Then there was the touch shutter, shooting an image immediately by a tap on the LCD screen. I even shot weddings with E-M5 and the camera delivered, as expected.

3) NEW 16MP LIVE MOS IMAGE SENSOR
The new image sensor was a surprise. Not only having more resolution, which was necessary to catch up to competition, but everything else in the image quality department got a nice upgrade. Dynamic range was noticeably better and high ISO performance was improved drastically. The image quality came very close to even what the best APS-C DSLR at that time had to offer, and that is saying something coming from a Micro Four Thirds sensor. The ability to bridge the gap when it comes to final image output was a huge determining factor for a lot of photographers. The only way to have a huge margin of image quality difference is to go full frame, but that is a story for another day.

4) ELECTRONIC VIEWFINDER
Another reason that held a lot of DSLR users back from getting a mirrorless camera, was the absence of a viewfinder and having to use the camera back screen to compose (Kirk Tuck cutely named this "Stinky Diaper Technique"). Olympus added an EVF into the E-M5, with very little lag and the refresh rate was high enough to look very smooth, even if you jerk and pan the camera around viewing through the EVF. The colors were accurate and pleasing to look at (certainly much better than the OLED camera back screen, which was my biggest complain of E-M5). Having that EVF makes a world of difference, and it sets the path for future high end mirrorless camera models. In fact, the subsequent release from Olympus, PEN E-P5 which did not have an EVF built in was not well received by critics.

5) 5-AXIS IMAGE STABILIZATION
Olympus single-handedly changed the public opinion on whether image stabilization is necessary in a camera or not. There was a popular opinion that image stabilization is optional because it did not directly affect the outcome of the images, and also the effectiveness of older image stabilizers was questionable. Olympus broke those beliefs by introducing their 5-Axis IS, something that sounded so alien and cool at the same time. I was the first to doubt the effectiveness of the new image stabilization system when I was briefed privately by Olympus. You have to understand, I was an engineer, you can claim whatever you want on paper but I will only believe it when I can prove it myself. And that actually happened, when I was testing the E-M5, the benefits of the 5-Axis IS, though in the first iteration, was undeniable, and I knew immediately this was the future of imaging products. 5-Axis IS has become a standard for high end cameras, just take a look at all other cameras out there from Sony, Fuji, Panasonic, Nikon, their highest end flagship cameras, don't they all have 5-Axis IS? It began in Olympus E-M5!

6) NEW BATTERY
To ensure that the battery can sustain the drain of all the new technology and features added to the E-M5 (eg 5-Axis IS, EVF, fast AF, etc) Olympus used a new battery, BLM-5 in the E-M5. The upgrade was much needed, and I could confidently get 500-600 shots per single charge. Unlike some other mirrorless cameras from other brands that dies after less than 200 shots per charge. (we are talking about 2012-2013 period of course).

7) TWO PARTER HLD-6 BATTERY GRIP
Olympus released battery grip to support the E-M5, and this design was the first in the world to make it two parter. There was the horizontal part only, to add beefier grip to the hand-holding area without the need of additional battery or bulk, keeping the camera as small as possible but with additional stability when holding the camera. Then there was a second part of the grip that added weight, bulk and another extra battery for longer shooting. The second part of the grip design is more DSLR battery grip conventional.

8) M.ZUIKO 12-50MM LENS
Olympus released M.Zuiko 12-50mm kit lens ahead of E-M5, which was weather sealed and has very capable macro shooting. There were no other weather sealed lens at that time, and having a weather sealed kit lens to go with a weather sealed body was crucial. I personally loved the 12-50mm lens, though I do admit the 12-40mm F2.8 PRO that came with E-M1 after that was a superior lens.


9) MAGNESIUM ALLOY BODY
If I remember correctly, the E-M5 was also the first mirrorless camera to feature a robust magnesium alloy body construction. The metal construction inspired confidence, and separated Olympus from the crowd. Only the highest end of DSLR cameras use magnesium alloy build, and having the same material construction placed the E-M5 at a different spot, bumping general perception of the camera that it was not a non-serious camera. 

10) TRULY COMPACT & LIGHT
All the above, the EVF, 5-Axis IS, new image sensor, fast AF, all packed into a small and light form factor of E-M5, this successfully demonstrated how a mirrorless camera should be. Small in footprint, yet capable to deliver professional quality results, and matching DSLR in terms of shooting performance. It paved a way for Olympus Micro Four Thirds system (many more cameras and lenses) to come. The small and light advantage was a big thing for Olympus, allowing the photographers to pick up the camera and shoot without worrying about neck strains or back pain!

I acknowledge the Olympus OM-D E-M5 was not a perfect camera, in my original review I did have my fair share of complains, but most of these shortcomings were fixed in the subsequent E-M1. Also Olympus never claimed the E-M5 to be a professional grade camera, it never was designed that way. Which hinted to the coming E-M1, but that camera deserves a spot on it's own.


I am sure many of you have owned an E-M5, or are still shooting with one. Is yours still alive? What are your experiences shooting with the E-M5? Share your story!


Please follow me on my social media: Facebook PageInstagram and Youtube

Please support me and keep this site alive by purchasing from my affiliate link at B&H. 
I made a short introductory video (WATCH HERE) with simplified explanation of photography fundamentals - the exposure trinity of Shutter Speed, Aperture and ISO. In the video, I explained what they were, how they worked, what photography effects they individually produce and how to control them using Olympus OM-D cameras. This is a quick, dumbed down version of photography basics for beginners, designed for newcomers to Olympus system and this is not a complete beginner's guide or how to use a camera. I made it as straight to the point as possible, cutting out all unnecessary bloat, with the aim of getting you to go out to shoot as soon as possible, because photography happens when you click the shutter button. 

For newcomers to photography, there are many simple and basic questions, such as how do I blur the background, how do I get motion blur, or how do make sure the moving subject is perfectly sharp? There questions are common, and can be easily controlled if the photography spent some time studying the very basics of how the camera operates, There is no shortcut to photography, if you want to take photography seriously, then you must master the fundamentals - shutter speed, aperture and ISO. Knowing how these settings work, and what they can do, you probably can do almost everything with your camera! 

I acknowledge that the video may be oversimplifying some topics, but it was never meant to be a comprehensive step by step tutorial. There are thousands of such videos out there, with articles and you can also by reference books if you want to explore anything further and in depth. The purpose of this video was to get you off your feet and start taking some pictures. Learn as you go, and you must allow yourself to make some mistakes along the way. You learn faster as you shoot more and more. I am a practical person, you can only learn something fully by actually doing it yourself. The problem with a lot of photographers (especially newcomers) these days? They talk too much and don't shoot enough. 

To freeze fast action, use fast shutter speed

To capture motion blur, slow down the shutter speed

To blur off the background, use large aperture (small F-number)

Shooting in very dark environment, ISO needs to be raised. 

Use large aperture for blur background "bokeh" efefct

Sports shooting require very fast shutter speed

This moment would have been lost if shutter speed was too slow. Prioritize shutter speed in fast action shoots

For light trails, you need very slow shutter speeds, such as this shot, taken at 4 seconds long. 

If you have a friend starting out photography, share this video, hopefully they will take Shutter Speed, Aperture and ISO seriously! Because, they cannot advance too much further without properly understanding and mastering all these basics first. Tell them what I said - there is no shortcut in photography! Learn your basics. 


Please follow me on my social media: Facebook PageInstagram and Youtube

Please support me and keep this site alive by purchasing from my affiliate link at B&H. 
It has been a while since I last did a review of anything, so here comes a new smartphone camera review, this time the much hyped Samsung Galaxy Note 10+. In this article I will be emphasizing solely on the Note 10+'s camera performance, reviewing it from a photographer's perspective. There are many fantastic reviews of Samsung Note 10+ out there, but when it comes to the camera review I find most of them unsatisfactory - not enough meaningful sample images to show what the camera is capable of, and sometimes, the tech reviewers do not even know what they were talking about. So here I am, having a Samsung Note 10+ in hand for almost a week, shooting daily with it, I am sharing my experience using the camera on the smartphone, and some images that I have taken with it. 


The Samsung Note 10+ unit I had was on loan from Samsung Malaysia for reviewing purpose only and will be returned shortly after. I am not associated with Samsung Malaysia, and I was not paid or asked to do any part of this review. This is a user experience based review, and I am sharing my opinion from an active practicing photographer's view, hence bear in mind my findings will be subjective. I will not review anything else from the Note 10+ apart from the camera's performance and capabilities. All images were shot in JPEG and minor post-processing was performed (brightness, contrast, minor crop). 

The Samsung Note 10+ has 3 camera modules at the back of the smartphone:

ULTRA WIDE ANGLE CAMERA
16MP, F2.2, equivalent focal length of 12mm

MAIN CAMERA - WIDE ANGLE
12MP, F1.5 or F2.4, equivalent focal length of 26mm, with OIS

MEDIUM TELEPHOTO CAMERA
12MP, F2.1, equivalent focal length of 52mm, with OIS

Other notable features of the camera:
LIVE FOCUS - for fake bokeh rendering
PRO MODE - for full exposure control of shutter speed, ISO, etc
PHASE DETECT AF
DEDICATED NIGHT MODE

For full specification, please visit official product page here. 

I have been using the Note 10+ as my daily driver for the past several days, and I have taken some  shots with the camera during my daily commute. I also did a short shutter therapy session around downtown Kuala  Lumpur city area, testing it in various shooting conditions. 


Three camera modules, from top to bottom - Ultra Wide Angle 12mm, Standard Wide Angle 26mm and Medium telephoto 52m

Note 10+ is one sleek, gorgeous, sexy looking phone. The edge to edge screen coverage is insanely beautiful. 

There are additional depth sensors, but let's not get too technical. Sorry about the dusts in the photo, this was not a paid product shot.

WHAT I REALLY LIKED ABOUT NOTE 10+

1) INTERCHANGEABLE FOCAL LENGTHS 

I really like that there are three different cameras with individual lenses built in the Note 10+. I especially treasure the medium telephoto lens 52mm which has become my favourite go to focal length for most of my personal shoots, and those of you who know me will know how I love 50mm equivalent focal lengths for general photography. Shooting with the 52mm equivalent medium tele lens, the images came out proportionate with minimal distortion, and this will result in more flattering looking portrait shots. 

I personally am not a fan of ultra wide angle lens, but I admit the importance of having one, and how in certain situations, having one can make all the difference in the world. Shooting in tight spaces, or going low angle to create dramatic effect, the ultra wide angle was a huge welcome.  I would use the main camera 26mm more, and that itself is already wide enough for most of my day to day shooting needs. 

The incredible fact is that I could switch easily between cameras/lenses, with minimal effort, and yes, the different focal lengths can acquire different image outcome.  However, for best/optimal image quality, I highly recommend staying with the main 26mm wide angle camera, since this camera has F1.5 wide aperture option which will allow better photographs in dim lighting conditions. Also, the 12mm ultra wide angle lens exhibits soft corners and some noticeable chromatic aberration issue shooting in high contrast scenario. 

2) VERY GOOD IMAGE QUALITY

I generally am quite impressed with the image output from the Samsung Note 10+. Image come out crisp and detailed, with sufficient contrast, looking life-like and beautiful. The JPEG engine does a good job in preserving good amount of details. The white balance engine nails the color balance very efficiently, even in some challenging scenario, producing some very realistic looking color rendering. Skin tones look pleasing without being too washed out like what most smartphones tend to do, and generally the colors never looked too fake or "overcooked", which was a surprise coming from Samsung, and I must say, well done!

If you do pixel peep, there are traces of over-sharpening, and aggressive noise reduction when higher ISO (ISO200 and above) are used, but those are typical problems with most smartphones out there, so nothing to care too much about. I'd say Note 10+ produces some of the best looking images from a smartphone camera I have ever seen. 

Dynamic range is more of a hit and miss situation. The HDR kicks in to save the day, but often being too aggressive, pulling out too much details from highlight and shadow region, defeating the overall natural look that the JPEG engine was trying to maintain all along. I'd take a slightly less aggressive approach and just not use the HDR in most cases. But hey, if you are not in a rush, it may be wise to try to turn the HDR on and off, especially dealing with the sky, sometimes HDR works like a mircale rescuing the blown highlights. 

52mm lens, ISO50

52mm lens, ISO50

12mm lens, ISO50

52mm lens with live focus, ISO40


26mm, ISO200

52mm lens with Live Focus, ISO640

52mm, ISO50


3) FAST & RELIABLE AUTOFOCUS

Perhaps another surprise was how well the AF on Note 10+ performed. When I was on the street, with the smartphone being on standby, as I saw something was happening, I switched on the camera, framed my subject immediately, made a quick tap on the screen for AF point selection, and BOOM. I nailed the shot, again and again! This was truly something impressive coming from a smartphone camera, as I have tested many smartphone cameras before (even some flagships) the AF was always lagging behind, sometimes taking a second or more to lock focus. Of course I am not expecting similar performance in low light condition, but even in very dim light, I could still find the AF locking on target quite effectively, and the slight delay was tolerable. If you are a street photographer and you intend to do some street shooting, the Note 10+ is a good consideration. 

4) GOOD LOW LIGHT SHOOTING

The Samsung Note 10+ does perform admirably when it comes to less than favorable lighting environment. Two important features that helped in low light shooting - image stabilization and also F1.5 wide aperture. Having image stabilization helps greatly in reducing camera shake and the F1.5 aperture, perhaps one of the brightest in the market helps in gathering as much light as possible without boosting the ISO numbers unnecessarily high. 

I find the images from low light shooting to be good, but I must also admit that high ISO noise reduction kicked in and there is smearing of details if we pixel-peep. Not a big issue, as general consumers would prefer working with smooth, non-noisy looking image, and that is fine, as this is what the Note 10+ is targeted toward. 

Note 10+ has a night mode, which I am less thrilled to talk about. The night mode, on paper, does extremely well in capturing bright, well exposed, and almost HDR looking images for dark scenes. However, the camera also selects dangerously low shutter speeds (as low as 1/3 second in some situation) and this was almost impossible to hand-hold. I also suspect that the Night mode takes multiple images successively to be composited into a single image to reduce noise, having slow shutter, to hold the camera steady for a duration of time, that combination is not very practical. 

Bear in mind that image stabilization is not available for ultra wide angle camera, the 12mm, so extra care is to be taken when shooting with ultra wide angle in extremely dark lighting. 

Having said that, I did come  home with a lot of night street images of KL that I really like. 

5) PRO MODE & LIVE FOCUS
I like the fact that I have full access to manual controls over the advanced settings such as shutter speed, ISO, white balance, etc in the Note 10+, though I have not used them much at this point. Having control is important to any photographer, and there will be situations when the automatic mode will fail, and the smartphone is not smart enough, and intervention from the photographer is necessary to get the shots. 

The Live Focus does a very convincing job in creating artifical bokeh, simulating blurred background that look somewhat real. It may be able to fool most average smartphone users who are non photographers, or have not used prime lenses or dealing with shallow depth of field on a daily basis, but hey, I like where this computational photography thing is going. I can clearly see this feature being added into a dedicated camera soon. And at the pace of the advancement, maybe one day we don't even need to shoot with large image sensors to achieve completely realistic looking bokeh. 


26mm lens, ISO800

26mm lens, ISO200

26mm lens, ISO500

52mm lens, ISO250

26mm lens, ISO320

26mm lens, ISO100, NIGHT MODE

26mm, ISO500


WHAT I HOPE NOTE 10+ WAS BETTER AT

Before I dive into my minor complains about the Note 10+'s camera, I must say that I am nick picking here and most of these complains may not even apply to average smartphone users. However, these issues, as tiny and harmless as they may sound, have affected my overall shooting experience and some even caused me to miss crucial shots. I am commenting using the photogapher's voice in me. 

1) LIVE VIEW NOT SMOOTH

This may come as a surprise to many - how can this be, Samsung is the largest manufacturer in the world! Their super AMOLED screen is the best in class! No really, the screen is fabulous, I have no beef with that. However, when the camera is activated, the live view is not smooth. First of all, there is a slight delay, not big enough delay to be annoying, but it is there and noticeable when shooting. I have been dealing with professional level photography equipment that has delay as little as 5 milliseconds, that is almost instantaneous. The lag on the Note 10+'s screen was probably like 0.1 or 0.2 second, but it was bad enough as if you are watching a YouTube video with slightly off-sync audio. It may not affect 95% of shooting scenarios, dealing with non moving objects, but for very quick action shots, this can be a problem. This is counter-intuitive to the blazing fast AF and shot to shot performance of Note 10+. 

Furthermore, the refresh rate of the screen during camera's live view is also poorer than expected. By default during normal smartphone operations, the refresh rate was something at 60Hz, that is not the case with the camera's live view. Quickly panning the screen around or moving the camera facing left to right, the live view appeared jerky and looked a little blurred. This is difficult for me to explain here, but you may find the example of this issue demonstrated in the video on YouTube. Note 10+ is a flagship level smartphone, featuring high end powerful processor chip, and I would expect the display to be crystal clear, lag free, and perfectly smooth.

2) SHUTTER LAG

I know I have just mentioned  how fast the AF and general shot to shot performance of the camera is, but there is a noticeable shutter lag. Shutter lag is the short delay between the press of the shutter button to the capture of the image. The shorter the delay, the better the response of the camera, and the higher chance of hitting the critical split second moment shot will be. AF was spot on fast, Note 10+ acquires focus very rapidly, but as the shutter button is touched, you can see about a bit less than half a second delay (0.3 second maybe) until the shot is captured. This should not be an issue if we are used to the timing of the shutter lag and can predict before hand how the camera will capture the image at each release of the shutter, but it would still be great to have almost instantaneous response from Note 10+. I know I may sound a bit ridiculous for expecting this level of performance from a smartphone, but we can always dream for better performing camera right? To me, nothing matters more than being able to nail the shot, so shutter lag is a crucial factor to improve on.

3) LIMITATIONS ON PRO MODE

I have praised Note 10+  for having extensive manual controls, but there are limitations to those controls which I wish could have been better.

Firstly, the ISO was limited at 800 at the highest setting.  For any camera in 2019, I would expect at least ISO3200 or 6400. I understand perfectly the conservative approach in restricting the high ISO  numbers, so that we don't get noisy looking image. Here is the truth - I'd rather get a noisy image, but free from camera shake or motion blur than having a clean, no noise image but blurred because shutter speed is not fast enough. You can clean up a high ISO image, it may look bad, but the content is there, the subject is there, the story is there, it is still a photograph. If the image is blurred beyond salvation without the help of high ISO, it cannot be rescued no matter what we do with too much blurring! Give us the high ISO!

Secondly, the shutter speed was limited to 10 second longest. I wish it stretches to about 30 seconds or beyond, maybe 60 seconds to allow us more creative control and freedom. Since the 26mm wide angle lens has bright aperture of F1.5, I'd imagine this would be perfect to shoot the night sky, maybe a milky way shot! I need the shutter speed to be at 20-30 seconds, and maybe ISO at 1600 to 3200! Unfortunately the ISO was stuck at 800 and shutter speed at 10 seconds now.

I also believe these limitations are software imposed, and can be made available!

12mm, ISO50

52mm, ISO50

52mm, ISO50

12mm, ISO50

26mm, ISO50

12mm, ISO400

26mm, ISO160


I strongly believe that smartphone photography is not the future, it is NOW. Smartphone camera is overtaking the popularity of traditional, dedicated camera use, and for most cases, the performance and quality for smartphone cameras today are more than adequate for average day to day use. I am glad to see the large manufacturers pushing the boundaries of smartphone imaging and I am sure more exciting things will come very soon.

Where does the Samsung Note 10+ sit in the world of photography in general? I'd place it at the spot of an advanced compact camera level. The ability to switch camera/lenses was a huge plus, multiplying the use and capability of the smartphone camera several folds. The camera's fast and reliable AF are already so good that I can trust the smartphone to do some serious street photography. I only wish it was not somewhat crippled by a live view that was not exactly smooth and lag-free, but that was just me nick-picking and on the whole the performance of the Note 10+ camera is commendable. Image quality was respectable, with great out of the camera results, good JPEG files with pleasing white balance and overall color reproduction. Combining all these factors with advanced control features like PRO mode, and ability to simulate fake bokeh background, in the hands of a capable photographer, he can fulfill most of the general shooting needs with just the Samsung Note 10+.

How then can the smartphone camera match a true professional camera? The image sensor size and lens used need to be larger, much larger. I know the overall design concept of smartphones is going to be slimmer, smaller, more compact.  I am also certain, if someone fits a much larger sensor size and high quality optics in a thicker, heavier smartphone body, yet somehow make it compact enough to carry around, that would be a killer camera phone. Who knows, maybe some day that will happen. At this moment, the only limiting factor to improve the smartphone camera further is the tiny image sensor size. There is only so much you can do with a small sensor, you cannot beat the laws of physics.

Having said that, I am also a photographer, and my wishes may not be representative of the general public. For most people, the Samsung Note 10+ has camera capabilities that may not even be fully utilized.

26mm, ISO320

26mm, ISOI00, NIGHT MODE

12mm, ISO320


My conclusion? The Samsung Note 10+ did better than my initial expectations, and I enjoyed myself tremendously using the camera and doing shutter therapy with it. To me, a photographer, I would be happy using it as my daily driver, and the camera fits my go to quick snapshot camera that can cover a wide variety of situations.

Do you have a Samsung Note 10 or Note 10+? Do share your experience using the camera. I would love to hear from you!

Please follow me on my social media: Facebook PageInstagram and Youtube

Please support me and keep this site alive by purchasing from my affiliate link at B&H. 
We have just hit 10,000 subscribers count on YouTube! Hurray!

Special thanks to all you beautiful people for the support. I started hitting YouTube more seriously back in July when I decided to post 2 videos per week, and was aiming to hit 10,000 subs by end of 2019. However, little did I expect, that goal happened much earlier, we are in September and it is now 10,150 subs and counting! I know for many 10k subs is not a big deal, especially when we live in a world where a 2 minutes video of a cat eating a corn can generate a million views. It may be a small step, but to me, this is a positive encouragement to drive me further and to strive to improve myself in the alien world of YouTube! Of course, all thanks to you guys for the likes, comments, shares and subscribing. 


Why YouTube?

I never intended to start or get serious in YouTube. However, I do admit that the world has moved on, photography blogs are losing popularity. Blogging or no blogging, I am still an active photographer, shooting both commercially and working on personal projects. YouTube seems like a great platform to reach out to an audience, and to continue to share my passion in photography. It is a place I can showcase my work, rant some ideas and share my skills and experience as a photographer. It is also evident that some techniques or explanation are better executed in a video format, than writing. It is easier to show how to take a portrait of a stranger through a behind the scenes video in 30 seconds, than writing a 2000 words article. 

Why did I not start sooner?

Blogging and doing a video are so different. In the blogging world, I don't have to show my face, and I don't have to speak. Writing is also easier to edit. I don't have to care about how I sound like, or if there is something in my hair, or if my face is in focus when I deliver a speech. I can write a blog entry anywhere, anytime, without worrying about lighting or camera battery levels. I was never comfortable speaking in front of a camera.

Furthermore, I am a complete noob when it comes to video shooting. I know not about the 180 degrees rule (slowly picking this up now) or how to create cinematic looking footage. Photography and videography are so different, now I need to think of a story-board, a script and B-rolls? Oh and also audio recording, because nobody likes to listen to poorly recorded voice speaking for 10 minutes long. There is a whole new world for me to learn, and I was just not ready to jump in yet. 

I released a video about the Olympus E-M1 Mark II and Firmware 3.0 in June, and it did really well. I made the video because it was easier to show the new features in video, than writing them. The response was quite positive, and after making an actual video and putting it up, I thought to myself, I can actually do this! I did everything myself, setting up a camera on a tripod, recorded my own voice separately (to be sync-ed up later) and you know what really baked the cookie? I edited that entire video in Windows Movie Maker. Yeap, the noob in me cannot be more obvious. 

Seeing that it was possible for me to handle everything alone, with careful planning and much consideration, some time in early July I decided to pursue YouTube more seriously. I knew I was not ready but if I kept telling myself that I will never be ready. So I decided to just jump in and do it!
I decided to upload two videos per week, every Mondays and Thursdays. I have been consistent ever since until today. There were a lot of stumbling blocks, I made a few mistakes there and here, but hey, I guess those were necessary. And in about more than 2 months later, now, we are at 10,000 subs! I did not see this coming at all. 

It was not easy, trust me! At least not for me. 

I am a terrible multitasker. I have to take care of the camera that is filming myself speaking or demonstrating something. The first camera to shoot video of me stays on a tripod, usually at a public location, so the fear of someone snatching the tripod with a camera and lens on it was always present. For every single shot I need to reframe, re-focus, and adjust the exposure settings. Then I have to also think about what I am shooting, or doing while being recorded in video. This is the tricky part, normally when I shoot, I gave 100% concentration to get my shots, either street shots, portraits, macro or anything else, I do not have to worry about anything else. Now that I am doing video, all by myself, I have to care about camera settings on two separate cameras! 

Besides the camera on hand, and on tripod (recording video), I also need to record audio, and that was done on a lavalier mic attached to my shirt (quite obvious if you have seen any of my videos) and that mic goes to a voice recorder in my pocket. The audio track was recorded separately and I sync them up with video in post. Oh speaking of post-production, I have absolutely zero knowledge jumping  into this. I decided to use Da Vinci Resolve (since it is free) and I have to learn everything from scratch!

I have so much more to learn, it is a long, long way, but hey, I am able to reach an audience and share meaningful content through the YouTube platform, that itself is true, and is enough reason for me to keep going. I know not where this will lead me, but not knowing keeps it both exciting and fun!

Again, thanks all for making the 10,000 subs possible. Shutter therapy goes on!

Please follow me on my social media: Facebook PageInstagram and Youtube

Please support me and keep this site alive by purchasing from my affiliate link at B&H.