I have blogged about my macro shooting technique several times now and I still use similar method to grab my insect macro shots most of the time. I do however experiment with different ways to achieve the same results, either by using macro converters or alternative lighting techniques such as LED light. The fun of macro photography is the many different options available to play with and there is no right and wrong - you just choose what works best for you. Obviously the most expensive option is macro lens, and most practical if you do a lot of macro shooting, but for those who do not do macro all the time, investing in a macro lens may not seem like a wise thing to do. Therefore, here is my suggestion for a minimalist and budget setup.
As usual, I made a video to accompany this article, and in some situations, real life video demonstration is more effective than me typing endlessly here. Video here (click).
There are two items required in this setup - a macro converter, the Raynox DCR-250 and a cheap, small, but powerful enough LED light. I was shooting with my own Olympus OM-D E-M1 Mark II and M.Zuiko 75mm F1.8 lens.
 |
| My humble setup - Raynox DCR-250 Macro Converter and Al-Cheapo LED Light, used on my own Olympus OM-D E-M1 Mark II + M.Zuiko 75mm F1.8 lens |
 |
| Raynox DCR-250 Macro Converter, bought mine at RM280, easy attachment to any lens with 52mm to 67mm filter thread sizes and increases magnification of the close up shooting multiple fold! Very good image quality, for a non-dedicated macro lens output. |
RAYNOX DCR-250 (RM280/USD70)
The converter works for any lens as long as the filter thread fits anywhere from 52mm to 67mm, but if your lens is smaller or larger than that, you may use step up or step down ring to fully use this macro converter. The Raynox DCR-250 is not a new product, it has been floating around for more than 10 years and have received universally positive reviews. Compact, light, yet budget-friendly, this macro converter is so simple and easy to use, just attach it to your existing non-macro lens and it brings your lens much closer to the subject, increasing the resulting magnification factor - close to what you can do with a dedicated macro lens. Of course there is some trade off when it comes to image quality, but for what it is, the sharpness, contrast and overall image still looks quite good for a non macro lens. I am personally happy with my insect macro images shot with the Raynox DCR-250 (I have attached it to Olympus kit lenses, 45mm F1.8, 75mm F1.8 and 12-40mm F2.8 PRO lens). In this blog entry, and particular outing I used the Raynox DCR-250 on my Olympus M.Zuiko 75mm F1.8. You don't need to attach it on a 75mm lens, even your humble kit lens will do!
 |
| Small, light, easy to carry - only RM25/USD6 for this portable LED light |
 |
| The brightness is not great but it works if you place the LED very, very close to the subject. |
THE CHEAP TINY LED LIGHT (RM25/USD6)
I usually shoot with flash, because I want the power and control, and flash usually has more neutral and better color coverage. LED usually is weaker and has an annoying color cast, which may not be fully corrected in post processing. Nonetheless, I do admit the LED light does have an advantage - you get live preview of the image as you are shooting with a mirrorless camera, and you know if the light is bright enough, or if your white balance setting is correct, or if the highlight and shadow fall at the right places while composing the shot. Flash won't give you that advantage and you only get the result after you press the shutter button. The cheap LED light that I was using was not particularly bright, but it was good enough if I place it very, very close to the subject that I am shooting, typically I have to hold it near the lens, from the top. The LED light won't give you the professional result like a true dedicated flash with diffuser or softbox can, which mimics real life studio environment, but hey, this is a minimalist, easy to use, ready to go, and super-budget friendly option!
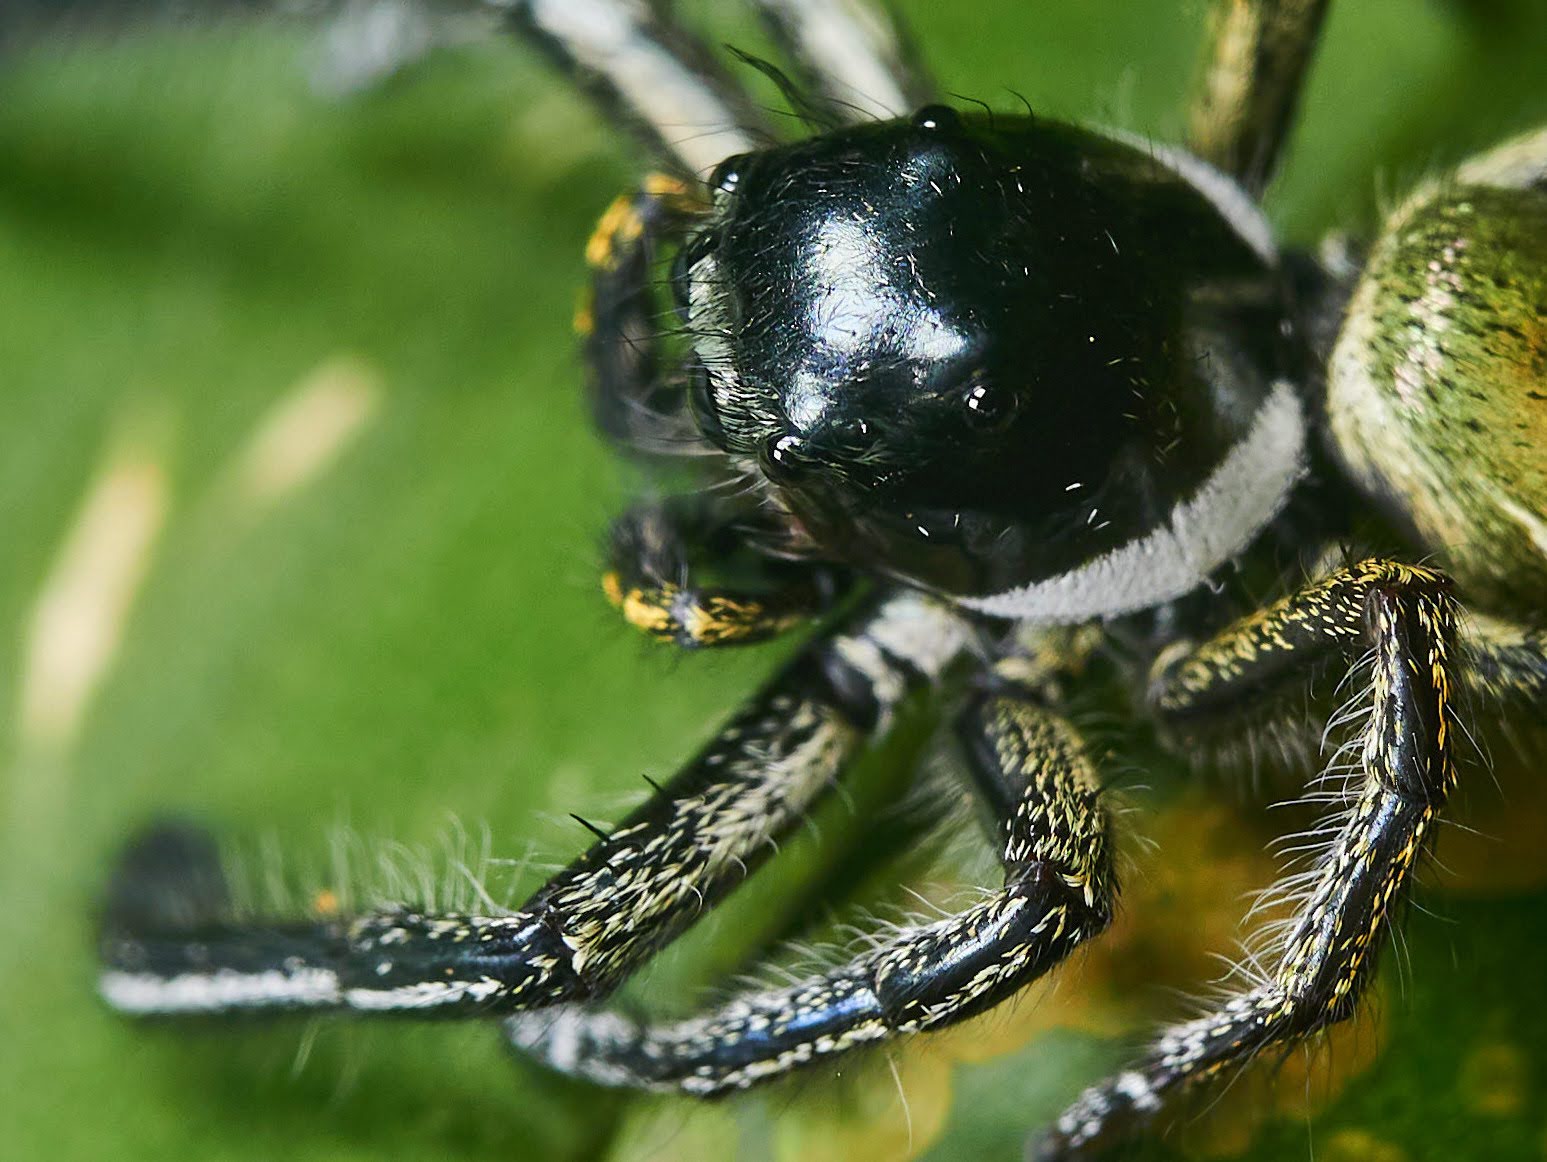
I was thankful that I was able to go out shoot in a local park before it was closed recently due to the semi-lockdown imposed by the government to control the rise of Covid-19 cases in Kuala Lumpur, Malaysia. Here are some shots I managed to capture with this simple setup, not really award-winning worthy, nothing to wow about, but I can totally see this work for those who wanted to explore the realms of macro shooting. It is so easy to execute, and more importantly, it won't cost you an arm or a leg.


 |
| Crop from previous image |

 |
| Crop from previous image |


 |
| Crop from previous image |


My execution is very straightforward. Here are my camera settings:
Aperture Priority
Aperture from F4-F8 (control depth of field)
ISO200-400, staying at ISO200 as much as I can
Shutter Speed I let the camera decide, but it floats from 1/60-1/200sec
LED light held very close to the subject, as close as possible
AF was used
Hand-held, no tripod or monopod utilized
White Balance was set to Daylight, but images were shot in RAW and colors were tuned in post-edit.
The LED light does give a magenta/blue cast
The biggest disadvantage of using this method, is in windy situations, or when the leaf or twig/branch the bug was one was moving/shaking. If I used a powerful flash, and the flash intensity is strong enough, I can use the flash to effectively freeze the subject movement, resulting in perfectly blur-free image. However, LED light does not have this effect, any shake and movement will be recorded, and in real life, shooting outdoor, we don't get zero movement all the time. Even the tiniest movement is sufficient to cause blur.
Nevertheless, for the cases where it worked, I did get some images that I thought I was quite happy with! There is magic in shooting insects and spiders - this incredible world is just waiting to be discovered and I hope you give it a try, if you have not done insect macro photography before. I have just shown you it can be easy, fun, and budget-friendly too.

Ultimately, I still enjoy shooting with the Olympus M.Zuiko 60mm F2.8 Macro and Olympus wireless flash setup. I will continue to find ways to tweak my execution and improve my results! This is an on-going experiment, and I am loving it.
Please support me and keep this site alive by purchasing from my affiliate link at B&H.


