I have done a review of the Olympus M.Zuiko 12-100mm F4 IS PRO lens before and published it on Ming Thein's site here (click), for those who missed it. I am revisiting this lens article and now I supplement it with a video of me discussing about the 12-100mm PRO lens. Full disclaimer: I do not own this lens, it is a loan unit from Olympus (one of the perks of being an Olympus Visionary) and I thought it would be awesome to explore this lens, especially those who are interested in using it as a travel lens, or one lens to do it all option. The video is not exactly a repeat of the review article but more like an extension, or after my extended use, especially after my short trip to Phnom Penh, Cambodia with only that one lens.


In terms of optical performance, this was one lens that Olympus added the secret ingredients to create a superior zoom lens. Considering a massive zoom range of 12-100mm, from wide angle to telephoto end, the image output is incredibly sharp throughout the entire zoom. The lens can be seen as a two in one lens, typically a combination of both 24-70mm (or 24-105mm) and 70-200mm equivalent on full frame coverage. Certainly this lens is made in mind for those considering to own only one lens, and do not want to bother about changing lenses, or own and carry multiple lenses in the bag.

The 12-100mm is a PRO grade lens from Olympus, having full weather sealing and robust construction. It is not a small lens, but balances well with larger camera bodies such as E-M1X and E-M1 Mark II. The lens has built in 2-Axis Image Stabilization that works hand in hand with the camera's  built in 5-Axis IS for a more effective 5-Axis Sync IS. Olympus claims about 7.5 EV stops of stabilization with the use on E-M1X, and 6.5 EV stops on E-M1 Mark II. I have tried the 12-100mm PRO lens on both cameras and can confidently verify the effectiveness of the image stabilization.

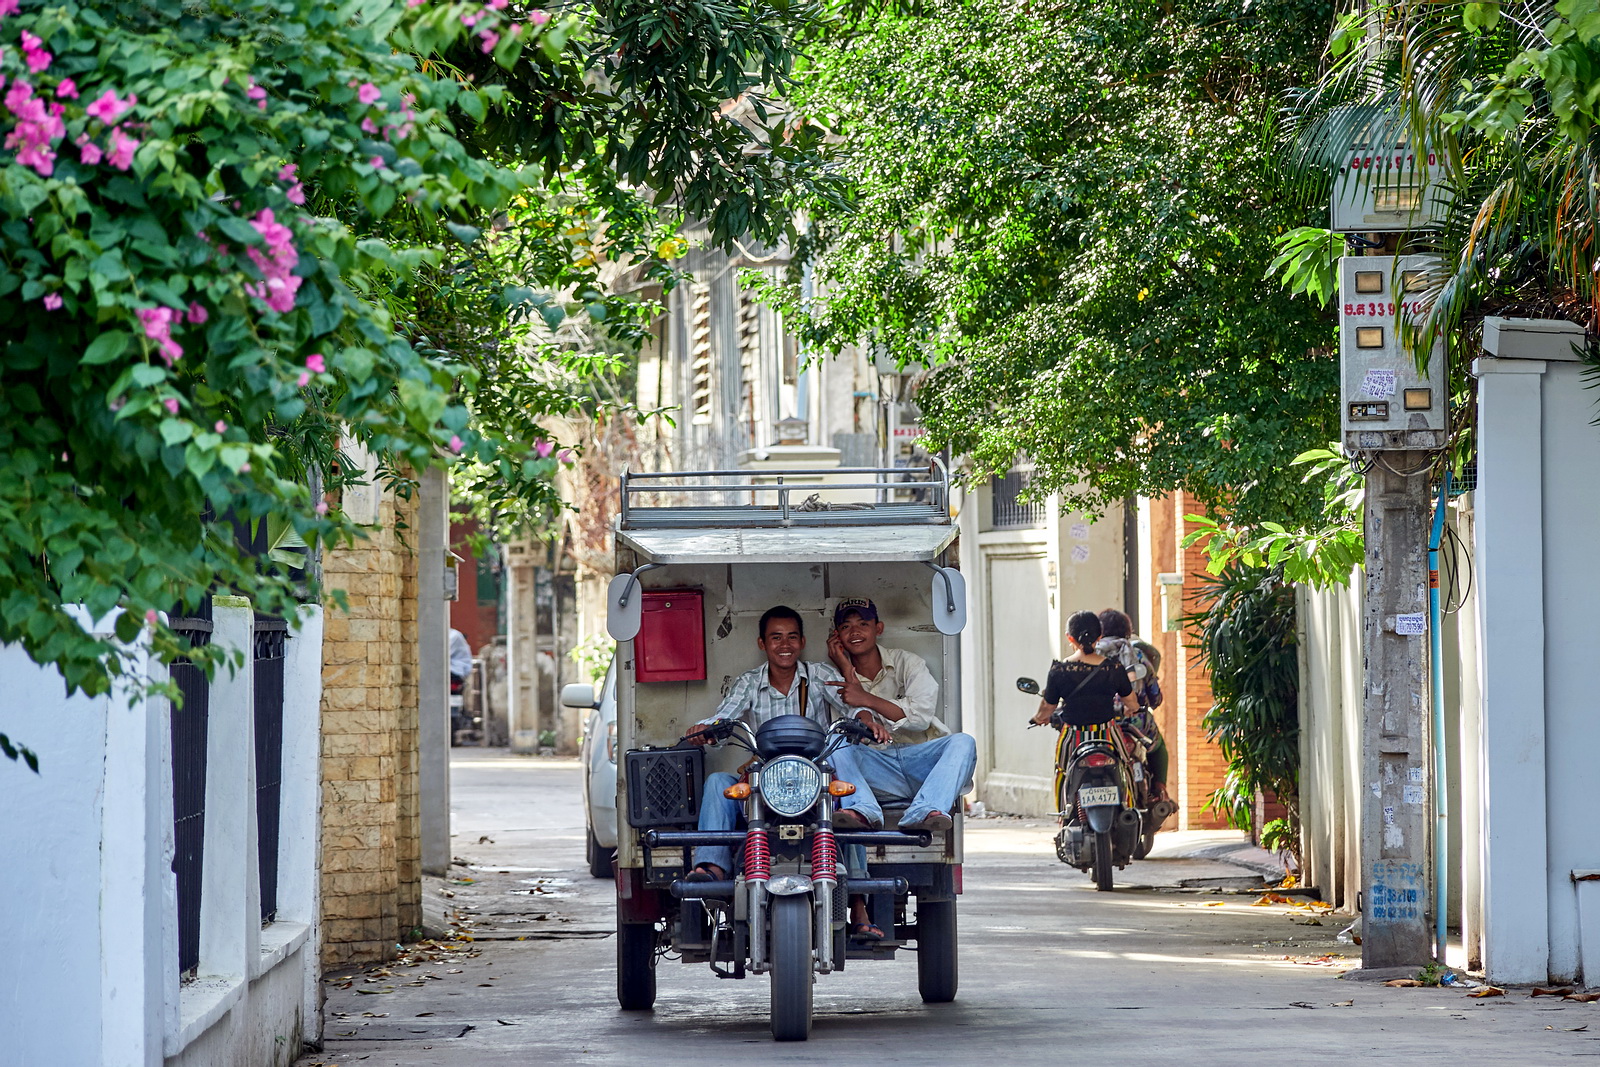
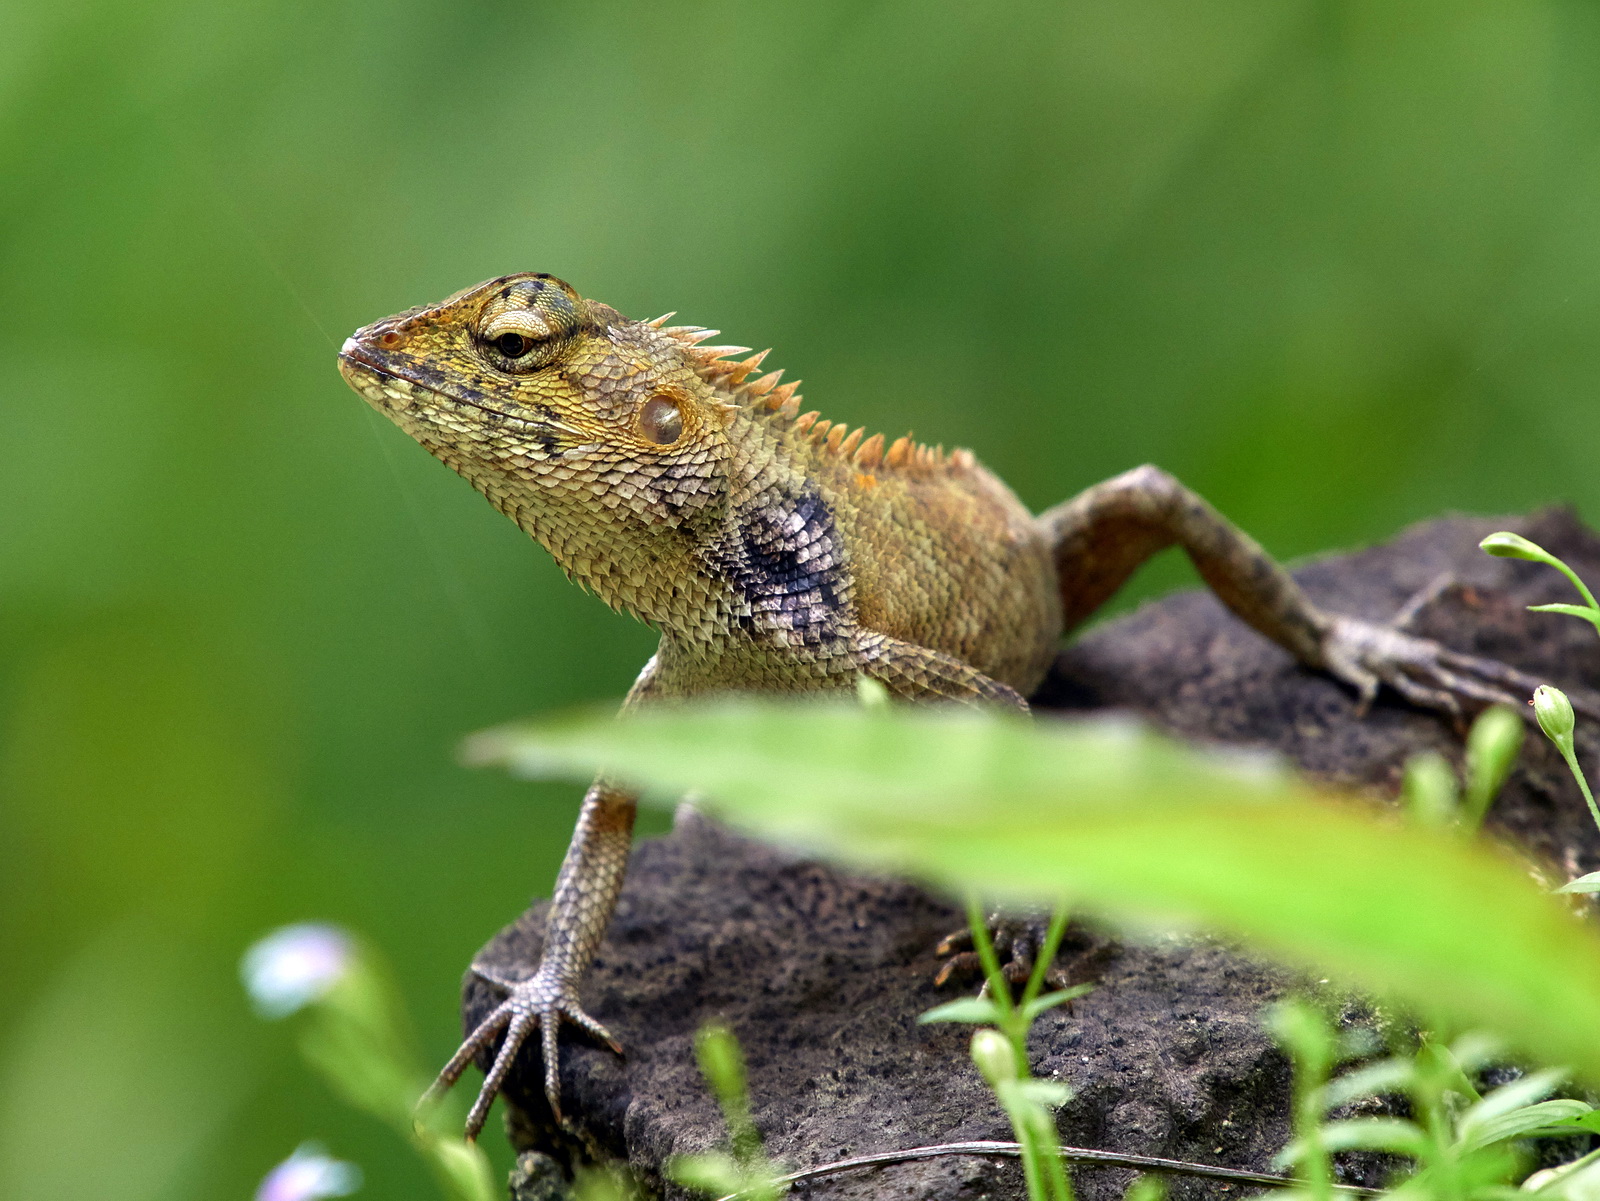
I have loaned the 12-100mm PRO lens multiple times from Olympus, and the best example I can show is a series of images shot in my Phnom Penh trip. I find that the lens in use with OM-D cameras such as E-M1 Mark II is just the right travel camera combo. You can almost do everything with this combo, unless you have specialized objectives, such as super wide landscape, or doing extreme telephoto shooting like wildlife or birding. In those cases the 7-14mm F2.8 PRO and 40-150mm F2.8 PRO with teleconverter, or 300mm F4 PRO would be necessary. Otherwise for simple street shooting and just documenting the journey, the 12-100mm F4 PRO is the best option to do everything.

If you compare the 12-100mm PRO against other prime lenses,  you will see the image quality is very similar, even if there is a difference it is difficult to tell. I am not denying the advantage of wide open brighter apertures of F1.8, or even F1.2 lenses. Certainly, better ability to render background blur and also shooting in low light are the key points of choosing prime lenses. In terms of optical performance, that 12-100mm F4 PRO is nothing short of impressive, going head to head with prime lenses.

Not only is the lens super sharp, there is no noticeable distortion and CA. (probably software corrected). I find there is very little to complain about the lens.


I can see a few reasons why some people may not find the Olympus 12-100mm PRO a compelling choice. If you want to minimize your camera footprint, say you have an Olympus PEN camera, attaching the 12-100mm PRO will  throw the combo out of balance, and the package is not exactly compact anymore. To keep the gear relatively small and light, smaller prime lenses and the pancake zoom lens work better, to shave as much weight as possible. Also, those who are constantly shooting in low light conditions, the F4 brightest aperture may not be sufficient to gather enough light. I won't talk about shallow depth of field rendering, because if having background blur effect is your main concern, why are you using Micro Four Thirds?

For those of you who own or have used the Olympus 12-100mm F4 IS PRO, do share your experience using the lens!

Please follow me on my social media: Facebook PageInstagram and Youtube

Please support me and keep this site alive by purchasing from my affiliate link at B&H. 
I had a week long trip home to Kuching in East Malaysia for Olympus Workshops and events,  and I managed to squeeze a bit of time for shutter therapy. I also thought it would be cool for me to show you beautiful people how my hometown is through moving pictures, instead of just stills! So for the first time, I have  video, showing you my street hunting locations around the central city area in Kuching. It was a brief morning walk, covering only a few spots and I wish I had more time to do more.  Certainly this will  not be the last video about Kuching, and I look forward to doing more "shutter therapy" series of videos, sharing mostly behind the scenes of what happened in each photo and how I captured them.

I personally love Kuching and it is a wonderful place for street photography. There are old colonial building design from the Brooke Family governance era, remnants of the past well preserved, being beautifully integrated within the city area itself. There is mixture of Chinese and Muslim architectural influences as well, seeing temples and mosques being at close proximity to each other. People are always warm and friendly here, and the streets are less congested in comparison to larger cities like Kuala Lumpur. The vibe is differently here, there is a sense of calm and definitely things are moving at a slower pace here.


I roamed around the streets with Olympus M.Zuiko 25mm F1.2 PRO lens on OM-D E-M1 Mark II this time. I did sneak in a shot taken with 45mm F1.8 in the video.

If you do come to Malaysia, and you are not in a rush, consider stopping by Kuching in Borneo. You won't regret it, I promise!

Please follow me on my social media: Facebook PageInstagram and Youtube

Please support me and keep this site alive by purchasing from my affiliate link at B&H. 
I have talked about this topic before - reasons to love your kit lens and use it first before considering to upgrade to better lenses too quickly. Therefore I shall keep this blog entry short. The reason I am bringing this topic up again, is to add a video I have just made about the said topic, I guess this would probably reach the different online crowd that prefer to watch rather than read lengthy articles. Of course, I shall port over some images shown in the video to this entry as well. This video (watch here) is targeted towards newcomers to photography of course, those first time camera buyers, or the step ups from smartphone camera to interchange-able system camera (regardless of what camera brands you use).


Basically the kit lens that comes with your camera, specifically Olympus kit lens M.Zuiko 14-42mm F3.5-5.6 EZ pancake is quite a good all-round performer. It has a versatile zoom range from wide angle 14mm all the way to medium telephoto at 42mm, surely good enough for general day to day shooting, covering a wide range of subjects. Yet the lens design is so small and light, the compactness used together with smaller Olympus bodies such as the PEN E-PL7 camera as shown in the video will not weigh you down, the smaller footprint encourages you to bring out the camera and lens to shoot more. The more you go out and shoot, the faster you learn about the fundamentals of photography and how the camera works. That will enable you to grow faster and be a better photographer.

The kit lens is sharp! Of course it will not be as sharp as high grade PRO lenses, or more  expensive set of prime lenses, but the kit lens can pull its own weight. If we pixel peep too much we will never be happy with whatever equipment we use. Honestly, the reputation of lousy it lens started during the early days of DSLR, certain "manufacturers" did include inferior and underperforming kit lenses (I shall not name the brands). But it is 2019 now, more than a decade later, everyone has learned a thing or two from past mistakes and the imaging business has become extremely competitive. No one can slack around anymore, there are not really any more bad lenses out there. It does not matter which lens is better than which, the main point here is - there are NO bad lenses. The kit lens may not be the best lens of the lot, but it is sure more than sufficient to fulfill your shooting needs, if you have just bought the camera and starting to get your feet wet in the photography world!

All images were shot with Olympus PEN E-PL7 and M.Zuiko 14-42mm F3.5-5.6 EZ Pancake lens


One of the things that got me crazy when I started shooting with my first DSLR with kit lens, was doing close up shooting. The kit lens can go super close to the subjects. It is no macro level but good enough to do something different and more creative. This reveals a lot of hidden details, which can be visually quite dramatic.

Finally, do not give up just because the kit lens has some limitations. Being restricted in terms of focal length range and aperture width may not be all bad. I must remind you that there is NO shortcut when it comes to photography. Buying that better lens will not solve all your problems. It may allow you to do certain things better, but if you did not sit down and figure out what went wrong or how to work around a problem, you will never grow as a photographer. Hence, having restrictions posed by the kit lens will help you to think outside the box, be more creative in finding different solutions around the problem to achieve what you want. Not enough zoom? You have to force yourself to move your feet and get closer to the subject. Not wide enough? Consider to do panorama shot! Not enough lighting? Not having bright lens is not an excuse, use a reflector, or adopt the flash and find ways to diffuse the light to make it look natural. You will grow and be stronger from overcoming the obstacles presented by the kit lens. It is not necessarily a bad thing. Trust me on this, I have been there.

Facing the challenges is part of learning and growth. Don't just dump the kit lens, give it a chance, and more importantly, give YOURSELF a chance.


I know a huge majority of you are now shooting with high grade OM-D and an assortment of high grade M.Zuiko lenses. If you have friends or relatives who have just started shooting, and exploring the deep, treacherous world of photography, do share this article and video with them! Encourage them to shoot and have fun, not to obsess with the gear lust which won't necessarily help much when you don't even know what the ISO button does.

Ultimately, as a new photographer, I would encourage focusing on these items:
Composition
Lighting
The Art of Seeing
Visual Story telling 
Decisive Moment

These are the things that will improve your results and help you be better photographer! I am not saying you should not upgrade your lens, don't just give up immediately! Have you fully utilized what the lens and the camera can do before upgrading? At least ask yourself this!


Please follow me on my social media: Facebook PageInstagram and Youtube

Please support me and keep this site alive by purchasing from my affiliate link at B&H. 

Let's unwind the clock and go right back to the beginning when it all started - the moment I got my first DSLR, the Olympus E-520! I have had the E-520 since 2008, I discovered photography with this small, entry level DSLR, and even did some commercial shoots with it. It has been a long way since E-520, I have upgraded to different cameras ever since, but the significance of that camera in my life is incredible. I want to relive some moments using Olympus E-520, and I want to discuss several items - my early photography journey, the growth of this site and of course - how I have come  to  love and stayed loyal to Olympus.

My E-520 is still alive and doing well, so I brought it out for shutter therapy! I was using a 2008 camera in 2019, and it was indeed an awesome  experience.


The main reason I chose Olympus entry level DSLR over any other options, was because it was significantly cheaper. I remember the E-520 with kit lens was retailing at RM2,599 in 2008. Alternatives such as Canon 450D was selling at RM3,899 with kit lens only, and a Nikon D60 was at about RM2,999 with kit lens (or was it RM3,299?). After doing much research, Olympus offers a lot more bang for the buck - built in image stabilization which was quite effective, live view that was somewhat functional, amazing kit lens being sharp and compact, wireless flash capabilities built in, and a decent optical viewfinder, which was bigger and brighter than the peers at that time. I acknowledged that when it came to Megapixel count, the high ISO numbers, dynamic range and AF performance, either Canon or Nikon easily won the race, but I was also a graduate engineer earning peanuts from a local consultant firm, and it took me a while to save up for my first camera. Budget was a big concern, and it was my very first camera, I did not think it was wise to go all out, especially when I did not even know how to properly control the basic exposure settings!

So I settled with the E-520. I simply loved it! I loved it so much I went out shooting almost all day on the weekends that I was not working. I would shoot anything and everything I could find - any free fashion shows at the malls, insect macro photography, random street outings, trips to the local zoo, bird parks, butterfly parks, flower gardens, anywhere that I can have an excuse to use my camera, I would definitely say yes. I was obsessed with photography, not so much on sharing my work or wanting people to notice me, heck I did not have a Facebook account until  much later. I just wanted to shoot and shoot and shoot and it has become and addiction - I was happy when the camera was in my hand and I was out shooting. 

Here are some shots from recent shutter therapy session in 2019 using the E-520! I was using the Zuiko 50mm F2 Macro, my kit lens was faulty. 


As I used the E-520, my blog also started to evolve. The original form was random daily musings, or sharing on what happened in my life - sort of like an online journal which I shared with family and friends. I started blogging when I was in Perth, Australia studying and it was a way to communicate and share my adventures with everyone else at home. However, I bought the E-520 when I have returned to Malaysia, and the blog then mutated into something else entirely. I started to share my weekly shooting adventures, new photographs and also my thoughts, experience and notes on my journey in photography. My experiments, trials and errors, what I have learned. It slowly grew steadily over the years, like any other blogs back then, but nothing spectacular happened. I was blogging for several years, until in the year 2010, when Olympus Malaysia took notice of me and invited me to test/review their then newly launched Olympus DSLR E-5, the new flagship!

That was the turning point of this blog, and also my so called "career" as a photography blogger, as I gained world-wide audience from that singular review of the Olympus E-5. I did not see any of this coming. I did not know what to expect, or how widely my review would spread out. I remember clearly when the E-5 came to me, I asked myself what can I do with it so that I will not be redundant or repeat what every other reviewers were doing? I did not want to "copy" or do the same things all over again. The typical comparison, charts and graphs, shooting at brickwalls, etc. I decided it would be best for me to just do what I have been doing all along, bring the camera and go out to shoot! Take as many good photos as I can, and share the photos, and I can write based on my experience shooting those photos. Thus, the final result of my Olympus E-5 review was me sharing my images and user-experience from a photography-enthusiast using the camera.

The review was received positively, and it was totally unanticipated. I guess I came in at a very awkward time, everyone else was spelling gloom and doom for Olympus E-System DSLR - people have been losing faith and jumping systems. Then came along this random dude from Malaysia who said the E-5 was actually a good camera? And I had photographs to back up my words! People may question what I have said,  or disqualify my opinions, but the sample photographs were real, and they did not lie. 


You see, all this would not have happened if I have used any other camera brands, because there were so many people writing and talking about Canon, Nikon or Sony cameras. I was probably one of the very few people  in the world, and the ONLY person in Malaysia actively blogging about Olympus camera, week after week, consistently for years, without fail. It was all with the Olympus E-520, a small, humble entry level camera from Olympus and because of that, I was able to connect with all you beautiful people and continue to do what I love doing, sharing my passion in photography!

The E-520 is a 10 Megapixels camera, something of a norm back then. To me, 10MP is still plentiful today, looking at the images I have captured, I did not wish I had more pixels. Looking at Full HD screen, the images still can hold its weight and they came out beautifully sharp. Shooting with the Zuiko 50mm f2 Macro, I got some very sharp results, that was an incredible lens from Olympus which was my favourite. I love what Olympus was doing with their color science, and the white balance engine was spot-on. The skin tones were pleasing, and overall I have always said the Olympus colors were true to life, and vibrant. The same signature colors can be found in newer cameras from Olympus.

ISO was limited to 1600, and if anyone has restriction today they would go crazy. But I did have an Olympus flash for my low light shooting, so it was all good. There were only AF points, and truthfully only the center one was fully functional as it features cross type AF with better sensitivity, hence I had no choice but to use center focus and recompose method. I had no issue nailing shots under good lighting condition, and even some quick action shots. I initially thought I would miss more shots using the E-520, but the AF proved to be more capable than I have expected.

Perhaps the most notable difference in shooting with E-520, was because it was a DSLR - hence I had to use the Optical Viewfinder. It was quite a refreshing experience, shooting with mirrored view, and looking through a small window into the world. I had no issues using an optical viewfinder, but I have moved on and definitely prefer the versatility of shooting through an Electronic Viewfinder. I treasure the ability to see live preview in real time, and being able to "pre-chimp"  (a term invented by Kirk Tuck) my images before I click the shutter button. I understand how some people may not like using EVF, it is like looking at a tiny TV screen, which is unnatural. I guess this is a situation where I chose to adopt and favor function - I just work more efficiently with EVF.


I can clearly see the Olympus DNA in the newer OM-D cameras in the E-520. The super control panel was already there. Olympus was quite adamant about in body image stabilization, unlike certain camera company that started with IBIS then abandoned it halfway then came back again much later in the game. I can see the signature Olympus look, sharp and detailed images from high quality lenses - this is perhaps their greatest strength, producing excellent optics and knowing how to manufacture them. Though it was a DSLR, the E-520 was really small and light, yet Olympus did not sacrifice the handling aspect, the beefy hand-grip area and overall very good ergonomics, you can clearly still see these traits in their newer cameras. In fact, Olympus was the first to introduce Live View in DSLR cameras, and in professional shooting environment. When they launched the E-330, with live view, many scoffed at Olympus and claimed that professional photographers won't shoot with the screen and only use the viewfinder. Yet today, Live View is in EVERY single DSLR and system cameras (mirrorless).

It is not difficult to put together how much I love Olympus products, I have always admitted this openly, it is not secret, and it all began with the E-520. The camera is special to me, it has brought me far, and it was my first love. I fell deeply in love both in photography and with Olympus through E-520. The E-520 will always have a special place in my heart.



I know some of you have been with me right from the beginning, for that I thank you for still staying here, it is indeed an honor being able to share and write here. For the newcomers to this site, I welcome you, and I hope you have found this "history lesson"  interesting, and you get to understand where I was coming from better.

If you have owned an Olympus E-system camera before, I would love to hear from you! Share your experience and your tales with your camera. I used E-520 and E-5 extensively before I switched over completely to Micro Four Thirds system.

It has been super fun reliving the nostalgia of shooting with my first DSLR - I hope you have enjoyed my sharing too. Do let me know what you think of the YouTube video I have posted, I am extremely new to video making, so any feedback is most welcomed.


Please follow me on my social media: Facebook Page, Instagram and Youtube

Please support me and keep this site alive by purchasing from my affiliate link at B&H. 
I managed to get my hands on the newly launched Olympus M.Zuiko MC-20 2X teleconverter lens, and I spent almost my entire weekend shooting with the MC-20 and finishing up this article, as well as a short video. Yes, you heard that right, Robin Wong doing video! I sure hope to do more video related content, and I feel that would benefit some folks who prefer watching over reading heavy text content. Don't worry, this blog is not going anywhere, and I will still continue to do my usual writing and sharing here. With lots and lots of photographs of course, that is not going to change.

Some disclaimers first - I am an Olympus Visionary, an ambassador to the brand, hence this is not a product review. I am merely sharing my opinion and feedback after using the Olympus MC-20 over the weekend. The MC-20 was on loan from Olympus Malaysia, it was not mine, and I have returned it after my testing. I used Olympus OM-D E-M1 Mark II, my own camera, with the latest Firmware 3.0 updated. All images were shot in RAW and post-processed with Capture One Pro, with only minor adjustments applied. Bear in mind my findings in this article may be subjective, I encourage everyone to read multiple sources of review before drawing a conclusion.

Here is a video (WATCH HERE) that I did, highlighting key features of the Olympus MC-20, and my quick thoughts using it shooting some birds in Kuala Lumpur.


Olympus M.Zuiko MC-20 2X teleconver lens was designed specifically to double the focal lengths when in use with Olympus M.Zuiko PRO lenses 300mm F4 IS PRO and 40-150mm F2.8 PRO. Currently, the MC-20 is only compatible with these two aforementioned lenses, and it will also be compatible with the announced 150-400mm F4.5 PRO lens, which has not been released yet at the time of writing. Using the MC-20, you get twice the reach of the original lens, eg MC-20 with 300mm PRO gives you a total of 600mm reach. However, there is a compromise when it comes to lens brightness, we lose 2 stops of light, that means instead of F4 wide open, we get F8.

Here are some key features of the Olympus M.Zuiko MC-20 2X Teleconverter lens
1) 9 elements in 4 groups lens construction, with one HR (high refractive) element to help suppress aberrations.
2) Full weather sealing when attached to Olympus OM-D weather sealed cameras and PRO grade M.Zuiko lenses.
3) Doubles the original focal length of lenses used, but losing 2 stops of aperture. 40-150mm F2.8 becomes 80-300mm F5.6 when MC-20 is attached, similarly 300mm F4  becomes 600mm F8.
4) Weight 150g
5) Features Olympus' own Nano coating (called ZERO lens coating) for flare and ghosting resistance

For full specification list, you may visit Olympus' official product page here (click). 


BUILD QUALITY & HANDLING

The Olympus MC-20 by itself is very small in size, and feels very light on hand (only about 150g). Therefore, this is a great solution to gain more reach without sacrificing much size, as you can attach it to existing lenses. It is so small, it does not add any bulk and can be easily stored at a corner of a bag. The MC-20 is made of metal construction, and is weather sealed.

After the MC-20 is securely attached to a camera and lens, it feels extremely solid. The build quality is excellent, using the combination shows no creaking or moving parts, everything felt together and holds tightly as if it was one piece of equipment. I expect no less from Olympus when it comes to lens build, and honestly, it did not feel like there was anything added onto the lens, unless of course you see it visually. The mounting is firm and feels reassuringly secure.


AUTOFOCUS PERFORMANCE

AF is a main concern for many, especially attaching an additional lens onto a lens on the camera, this usually degrades the optimal AF speed and accuracy. I am pleased to say that the AF performance of Olympus MC-20 in use with 300mm PRO or 40-150mm PRO is still superb, much better than what I was initially expecting. In most cases, there was completely no hesitation, the AF works almost as good as the native lens without the use of teleconverter, acquiring focus almost instantaneously, even from near focus to a subject that is in quite a distance away. Accuracy is also good, and the AF is so reliable, I never used manual focus for any of my shots, which I originally thought I may have to resort to just in case.

In fact, I personally felt that the Olympus MC-20 performs noticeably faster than MC-14, based on my experience. I did not have the chance to do side by side comparison, but my past experience using MC-14, I remember some minor hunting, which happened more frequently than the MC-20, and I distinctively felt that the MC-20 focuses more confidently and just overall quicker. I am not sure how much this could be due to the new AF algorithm of Firmware 3.0 in E-M1 Mark II, as the previous time I used the MC-14, I was not using the latest Firmware 3.0. I don't have an MC-14 to verify this at the moment, and an important note - I did not test the MC-14 on E-M1 Mark II with the new Firmware 3.0. You should not have to worry about AF using MC-20, it is surely more than sufficient.

Before we start talking about image quality, let's have a look at some sample images! I went to the KL Bird Park, and spent a few hours in there, attacking the birds and anything else that I could point my lens to.

40-150mm PRO with MC-20
300mm, F5.6, 1/80, ISO640

Crop from previous image

40-150mm PRO with MC-20
300mm, F5.6, 1/30, ISO200

Crop from previous shot

40-150mm PRO with MC-20
250mm, F5.6, 1/50, ISO800

40-150mm PRO with MC-20
300mm, F5.6, 1/50, ISO400

40-150mm PRO with MC-20
300mm, F5.6, 1/400, ISO320

IMAGE QUALITY

Perhaps the biggest worry for most people is the sacrifice in sharpness when any teleconverter is used, the longer the teleconversion, the worse the compromise is when it comes to overall image quality. This is true, especially with so many iterations of teleconverter lenses from many other manufacturers, degrading what the original lenses were capable of to something that some may even categorize as completely unusable.

Before I started using the lens, I was managing my expectations that I may not be going home being impressed by the Olympus MC-20. I was prepared to accept poor results, and started to form words in my head on how to approach this article if the image quality output is below my expectations. The original MC-14 was superb, but we never know about a two times conversion lens, that is just so much more to compromise.

When I first started shooting with the MC-20, I did struggle using it. It was my first time using an equivalent 1200mm (in 35mm format) lens, I have not dealt with anything this long before! The shooting condition was not ideal, it was raining half of the time I was in the park, and the rest of the time it remained heavily overcast, the environment was not well lit. Working with widest aperture of F5.6 (with 40-150mm PRO) and F8 (with 300mm PRO) made things worse, as there was already not enough light to work with. I constantly needed to bump up my ISO to achieve sufficient shutter speed, which in turn further degrade the image quality. It took me a while to get used to such long focal lengths and get used to the somewhat unanticipated challenging shooting circumstances.

When I managed to figure things out, when everything started to fall into place nicely, my goodness, the image quality was nothing short of impressive. There were times I almost forgot I used a teleocnverter when I inspected the images, the sharpness, the amount of details captured, was a lot better than what I expected in the first place. The amount of contrast captured, despite the horrible lighting situation, was really good. Olympus did it guys, I do not know how they did it, but they somehow managed to create a 2X teleconverter lens that does not suck. In fact, that MC-20 is an impressive little conversion lens that birders and wildlife shooters MUST have.

40-150mm PRO with MC-20
300mm, F5.6, 1/80, ISO1250

Crop from previous image

40-150mm PRO with MC-20
300mm, F7.1, 1/250, ISO200

40-150mm PRO with MC-20
300mm, F5.6, 1/800, ISO200

40-150mm PRO with MC-20
300mm, F7.1, 1/500, ISO200

40-150mm PRO with MC-20
300mm, F7.1, 1/200, ISO800

40-150mm PRO with MC-20
300mm, F8, 1/320, ISO1600


Other notes on the image quality, I did not notice any pincushion distortion, but this could be also due to aggressive software correction applied to the images (at RAW file level). I also notice very little trace of chromatic aberration. The corners are noticeably softer than center sharpness, so if you do shoot with the MC-20, it is best to center your subjects for best possible output. Basically, there is very minimal compromise when it comes to image quality, and I was genuinely surprised by what the little MC-20 can do.

If we compare directly (which I did not, there is no point seriously) against image quality of the original lenses without the use of MC-20, of course these original lenses would do better. There is no question in this. The real question is how much is the drop of sharpness of overall image quality going to be after the use of 2x teleconverter, and are the results still within the acceptable margin?

The original M.Zuiko 40-150mm F2.8 PRO and 300mm F4 PRO were extremely sharp lenses, perhaps "over-engineered" by Olympus, and I remember they were particularly proud of the creation of 300mm lens, that was the pinnacle of Olympus' lens making technology, and a great display of their optical design prowess. Thus, even if there was a drop of sharpness when using the teleconverters, after the conversion these lenses are still performing well and can deliver beautiful results.

300mm PRO with MC-20
600mm, F8, 1/30, ISO1600

300mm PRO with MC-20
600mm, F8, 1/100sec, ISO400

300mm PRO with MC-20
600mm, F8, 1/50, ISO1000

300mm PRO with MC-20
600mm, F8, 1/250, ISO1250

40-150mm PRO with MC-20
300mm, F6.3, 1/250, ISO400

Crop from previous photograph


CHALLENGES USING OLYMPUS MC-20

I have to admit, this was possibly the most difficult test of a lens I have done, ever in my life. As I mentioned earlier, it took me a while to get used to the supertelephoto range and all the challenges that came along with it. I want to further discuss about these points.

Firstly, hand-holding such a long lens was a world of difficulty on its own. Hand/camera shake is amplified multiple fold, and it was simply a challenge to hand-hold and to keep everything steady. While Olympus claims superior image stabilization, be mindful that the longer the lens is, the more critical your hand-holding technique will have to do. I am not a bird shooter, I don't do wildlife photography, hence I don't handle very long lenses often. Mix my inexperience using supertelephoto lenses with the unfavorable lighting condition, it was a nightmare to work with. I constantly struggled to get sufficiently fast shutter speeds, and I knew if I bumped up the ISO more I will get bad results.

Secondly, the compromise of lens brightness. We know that instead of getting F2.8 and F4 brightest aperture, which were really great to work with even in low light, now that with the MC-20, the widest aperture becomes two stops darker - F5.6 and F8. The reason I have more 40-150mm and MC-20 shots instead of 300mm, is because of the F5.6 wider opening. At F8, under heavy shade or in locations with not enough light, hand-holding the lens can be quite a pain. There was no way I could shoot a constantly moving bird at 1/20 second, even if I could steady my shot, the bird will still come out blurry. I was already at ISO1600, and sometimes ISO3200!

Thirdly, Olympus mentioned this in their official page - there is a loss of one stop image stabilization effectiveness when MC-14 or MC-20 is attached. Yes, you heard that right, the 5-Axis IS loses some of its effectiveness when the teleconverters are used. Here is the problem, at longer focal length. higher shutter speed is needed, yet we lose one precious stop of image stabilization, this results in even more difficulty hand-holding such a long focal length.


Having said that, I did manage to get some sharp results from ridiculously slow shutter speeds, as I was very adamant in shooting with lower ISO numbers to get cleaner results. I would not recommend going crazy with slower shutter speeds though.

40-150mm PRO with MC-20
300mm, F5.6, 1/200, ISO1250

40-150mm PRO with MC-20
300mm, 1/50, F5.6, ISO400

40-150mm PRO with MC-20
300mm, F5.6, 1/200, ISO800

 40-150mm PRO with MC-20
300mm, F5.6, 1/80, ISO640

40-150mm PRO with MC-20
190mm, F5.6, 1/200, ISO1600

The Olympus M.Zuiko MC-20 2X Teleconverter lens retails at RM2099 in Malaysia, it is not really budget-friendly, but I can totally see how the price is being justified.

Optically, the lens design is excellent, providing superb image quality with use on M.Zuiko 300mm F4 PRO and 40-150mm PRO lenses. While there is a minor drop in sharpness when the teleconverter is attached, the overall image quality is still fantastic, and can be amazingly sharp, detailed and rich in contrast. The compromise of losing 2 stops lens brightness is something that we have to live with using the MC-20, but under good light, I can see how the MC-20 can really shine, giving you phenomenal reach of 1200mm equivalent when used with 300mm lens. That shows the true potential of what Micro Four Thirds, specifically Olympus OM-D system is capable of.

If you are a wildlife and bird shooter, you need that extra reach, get the MC-20, it does not weigh much, and it adds that much more versatility to your already incredible lenses.

Please follow me on Instagram and Facebook Page. 

Olympus M,Zuiko MC-20 2X Teleconverter Lens is available from B&H.